
DIY Craft – Pet Pocket
We asked the very talented Amy Bethune—she’s a quadruple threat: college chemistry professor, photographer, blogger, and maker of beautiful things—to share how to create her cute, handy little pet pouches that attach to a dog’s collar. Happily, she obliged. They store your key or card and a few extra bags so you’ll never be caught out unprepared. Take it away, Amy…
We asked the very talented Amy Bethune—she’s a quadruple threat:
college chemistry professor, photographer, blogger, and maker of
beautiful things—to share how to create her cute, handy little pet
pouches that attach to a dog’s collar. Happily, she obliged. They store
your key or card and a few extra bags so you’ll never be caught out
unprepared. Take it away, Amy…
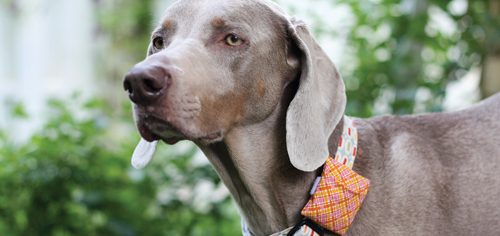
I don’t want to offend anyone by being too graphic, but my dog Lola and I take a lot
of walks and jogs and sometimes I forget to bring along a little baggie for…well, you
know. So, it dawned on me on a recent excursion that I could make a little “wallet” to
store a plastic baggie right on her collar. Of course, they have little baggie things that
dangle from the collar, but I know I wouldn’t like that banging around, and I thought Lola
would be annoyed by it too. She’s kinda particular. Anyway, here’s a quick little project
to make such a pouch. Of course, you could keep a card or key in it, too, if you’re so
inclined. This pouch fits one large or a few small bags inside.
Getting Started
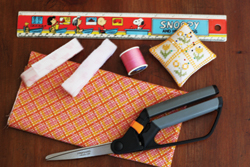
Tools & Materials
• Fabric swatch (3″ x 8″)
• Needle and thread (a sewing machine
makes this project lightning fast, but
isn’t necessary)
• Straight pins
• Scissors
• Velcro (2 inches of 1″ wide)
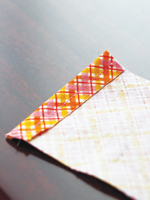
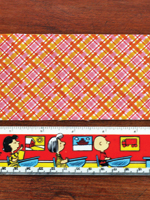 Step 1: To begin, cut your fabric into a 3″ x 8″ rectangle (I’ve had
this ruler since grade school in case you were wondering).
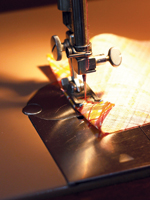
Fold each of the short ends over by 1/2 inch and sew down the
center of the fabric, 1/4 inch from the fold. Repeat on the other
end.
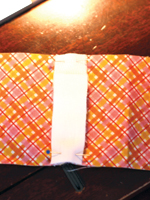
 Step 2: Now, with the good side of the fabric toward you, pin
the Velcro to the middle of the fabric. Make sure that one side
of the Velcro (for instance, the fuzzy side) is up while the other
(the sticky side) is down. They should be overlapping quite a bit
and sticking to each other now. Baste the Velcro in place and
remove pins.
 Step 3: Fold one side up (back side of the fabric will be exposed)
about 1/2 inch beyond the Velcro.
 Step 4: Now, fold the other side over as well so that it overlaps
the first “flap” by about 1 inch.
 Step 5: Sew along both edges of the pouch about 1/4 inch from
the edge.
 Step 6: Now, flip the right sides of the fabric out. Be sure to use
a knitting needle or something pointed to push out the corners
of the pouch so they’re square. And the pouch is done.
Now head to the dog park and await compliments!
→ Check out more of Amy’s inspiring projects, photos, and
designs at theb-line.blogspot.com.
Join the newsletter and never miss out on dog content again!
"*" indicates required fields
By clicking the arrow, you agree to our web Terms of Use and Privacy & Cookie Policy. Easy unsubscribe links are provided in every email.